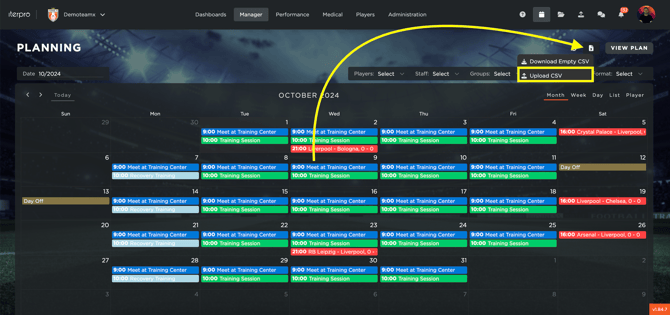
Creating events via CSV allows you to quickly upload multiple events at once, saving you time and ensuring efficiency. To get started, you will first need to download the CSV sample from the "Planning" section, located in the top-right corner of your screen.

Here are the mandatory fields you need to fill out to create a new event:
- TITLE: The title of the event (text string).
- START: The start date and time of the event (format: DD/MM/YY HH:MM, e.g., 01/10/2024 10:15).
- END: The end date and time of the event (format: DD/MM/YY HH:MM, e.g., 01/10/2024 11:30).
- FORMAT: The format of the event (choose one from: General, Travel, Training, Game, Medical, Assessments & Examinations, Administration, Off, International Duty).
In addition to these mandatory fields, you can fill out the following optional fields.:
- NO
- ALL DAY
- DESCRIPTION
- NOTES
- SUBFORMAT
- SUBFORMAT DETAILS
- TYPE
- WHERE
- RESULT
- RESULT FLAG
- WORKLOAD
- INTENSITY
- THEME
- SUBTHEME
- HOME
- FRIENDLY
- DESTINATION
- OPPONENT
- INDIVIDUAL
- TEST MODEL
- MEDICAL TYPE

Once you have filled out all the relevant information, save your CSV file with one row per event. You can then upload the CSV by selecting the UPLOAD CSV button in the top-right corner of your screen. This will add all the events from your file into the system in one batch.