
CREATE A NEW USER
SET THE PERMISSIONS
ADDITIONAL OPERATIONS
FEATURES DESCRIPTION
Note: This section is only available for Admin Users.
To access the user management area:
-
Go to Settings → User → Users & Permissions.

Creating a New User
To add a new user to the platform:
- Locate and click the "ADD" button in the top right corner of the user list.
- Fill in the email (you can add multiple emails at once).

-
If the user requires full system administration privileges, toggle the Club Admin permissions and select the language.

- Click "Save".
Once saved, the newly created user will automatically be added to your active users list, and will receive the Welcome Email.
Note: The invitation token in the Welcome Email, has a duration of 24 hours, which means that you will have to invite users again after this time limit.
Resending Invitation Email and Editing User Information
If you need to resend the Welcome Email to a user, simply click on the three dots icon and and choose "Resend Invitation".

To update a user's personal details, contact information, or roles, click directly on their name or email address to open their profile details, make your edits, and save changes.

Granting Team Access and Setting Permissions
Before granting access, review the available user licenses for each squad:
- Remaining Slots: The Users & Permissions section displays the remaining available user slots for each active team.
- Slot Allocation: User slots are strictly team-specific. If a single user is granted access to three different teams, they will occupy one slot within each of those three individual teams.

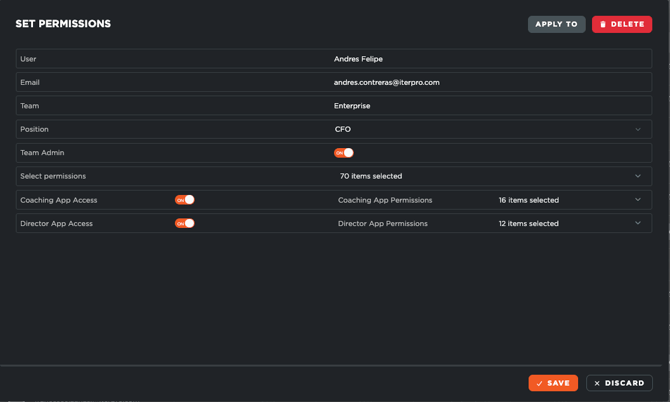
To Grant Access and set the correct Permissions:
- Find the target team and click "Grant Access"(screenshot above).
- Define the user's specific Position or role within that squad.
- Set the user as Team Admin or not (granted him/her to provide credentials and access to the Player App users)
- Customise the user's specific Permissions.
- If applicable, enable mobile access for the Coach App and Director App, adjusting their respective permissions for those individual apps.
- Save your settings.
- Once all the permissions have been set, you can apply them to any user in the same team by clicking on the APPLY TO button and selecting the desired people.
Note: When you create a new user and assign them to a team, the system automatically generates a corresponding Staff Member profile within your club. This profile is automatically linked to the active Team and Season, ensuring the staff member is immediately ready to be scheduled and utilised across the platform.
Deleting a User/ Revoke Invitation
To delete a user:
- Select the checkbox next to the user's name in the directory.
- Click the "Delete".
- You can click the three-dot menu next to the player's name and click on Revoke invitation (if he hasn't accepted it) or Delete User. This will remove his record from your list.

Download a CSV Report
You are able to export your user list in CSV form, which will allow you to see in detail all the information, permissions, teams, and so forth for each one of them. To do it, click on the CSV Download icon.
